Logging in to your CMS—and getting back to it.
An overview of your CMS's features and sections.
Learn how to change the content and components.
Logging in to your CMS—and getting back to it.
Taking control of your beautiful new website starts with accessing its built-in content management system (CMS for short). And that process usually starts with an email from your website’s designer.
It probably looks a bit like this:
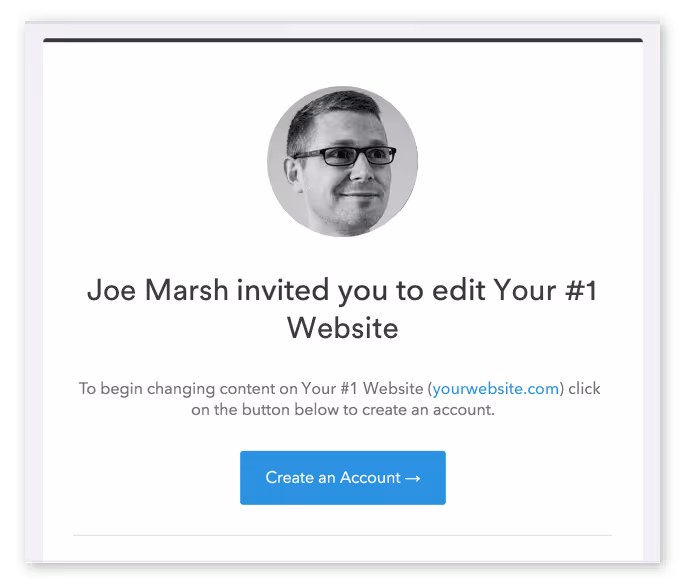
When you click that button, you’ll be taken to your website’s CMS — which, at first, will look just like your new website. Except now, you should see a grey bar across the bottom, with a simple form.
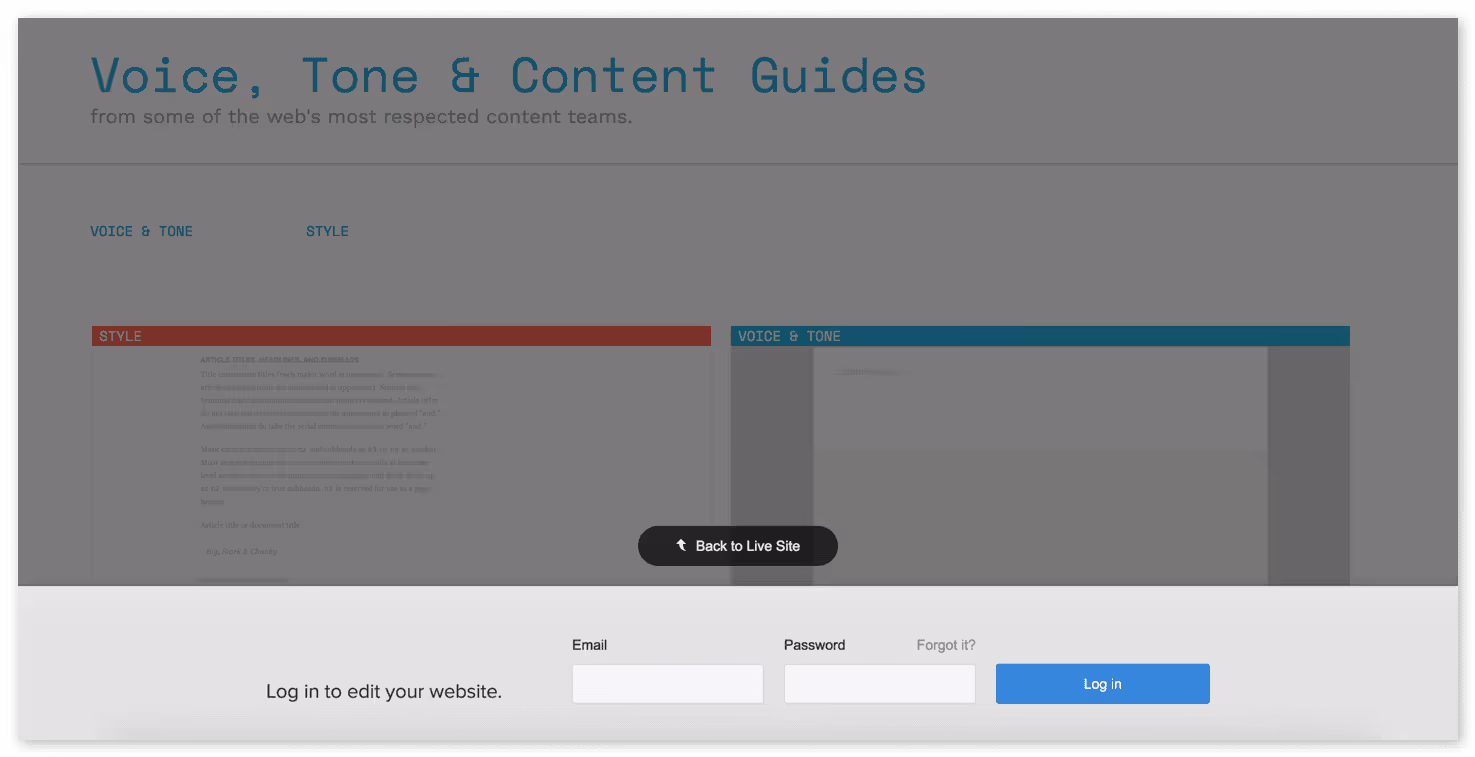
Then, just fill in the required fields to create your account and log in.

Now, your content management system should look just like your website — except there’s a toolbar with two browser-like tabs labelled Pages and Collections, plus a series of icons. I'll explain all that below.
For now, take a moment to bookmark this page so you can easily return to it later. In most browsers, you can bookmark a page by holding Command/Control + B.
Otherwise, you can always return to your site’s content management system by simply typing the URL, then adding /?edit to the end.
So if your website’s URL is yourwebsite.com, just go to yourwebsite.com/?edit to log in and start editing.
When you return to your site later, you may see a little pencil icon in the lower right, which you can click to hop into your CMS. Rest assured that only those with access to the CMS will see this icon!
With the basics out of the way, let's dig into the CMS itself.
In the world of web design, CMS stands for Content Management System. As the name suggests, it's a system for managing the content of your website.
CMS was invented for two reasons:
Your CMS allows you to edit almost any existing content on your website, including text (or “copy”), images, buttons, links, etc.
It also allows you to create some new pages and blog posts through Collections.
Now that you’ve created an account for your site’s CMS and know how to get back in to it anytime, let’s get to know the interface itself.

Let’s start with the two tabs on the left, Pages and Collections. These are your CMS’s two default tabs. You’ll be able to open more tabs, as you’ll see later, but these two will always be there for you.
The Pages tab, as you might imagine, contains a list of your site’s pages. It’ll be divided into at least two sections, but probably more:
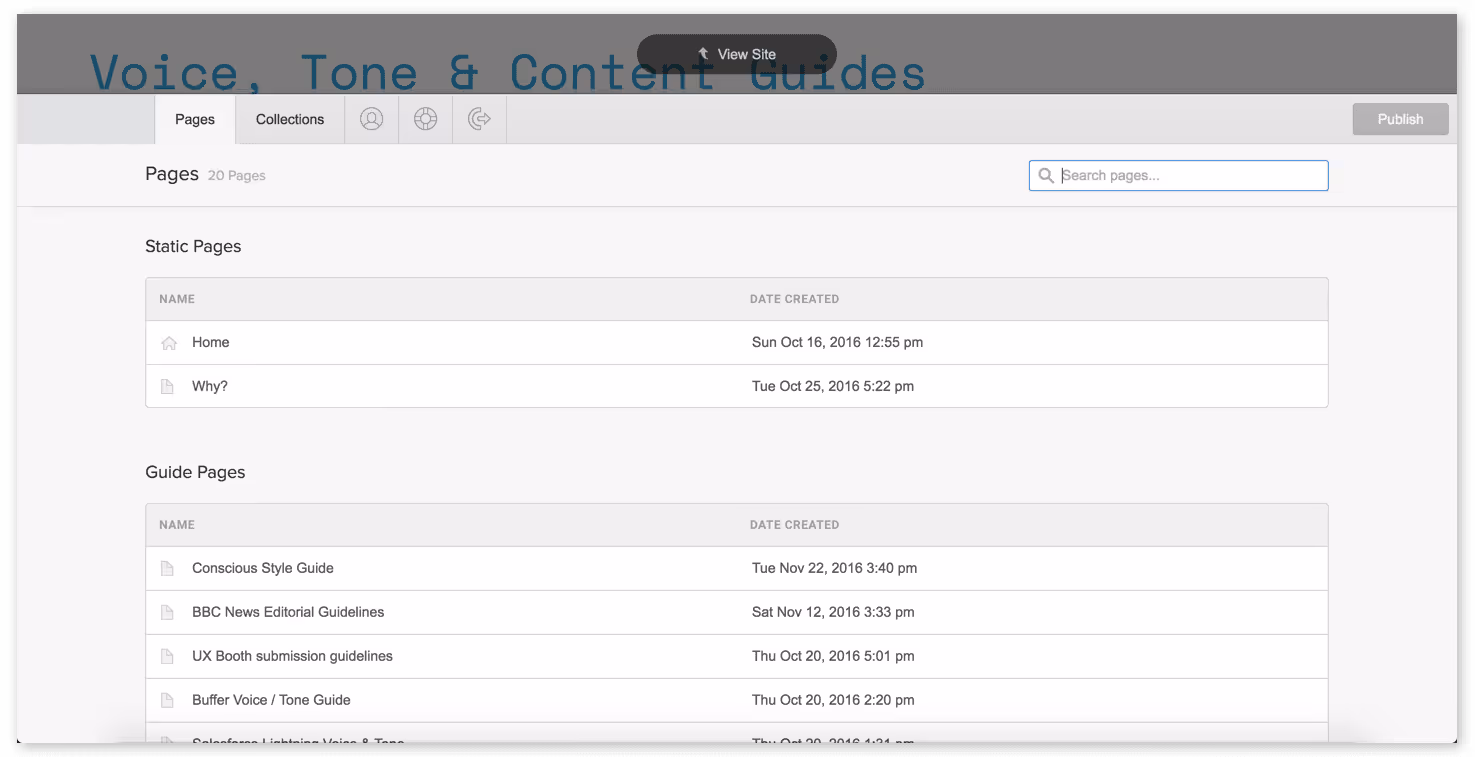
The Pages tab allows you to do several things:
Because these page settings are so important for search and social, let’s dig a little deeper into what each of these settings actually means, and how you can make the most of them.
SEO stands for “search engine optimisation.” It’s the practice of building and improving websites in order to improve their chances of being found through search engines like Google, Bing, etc.
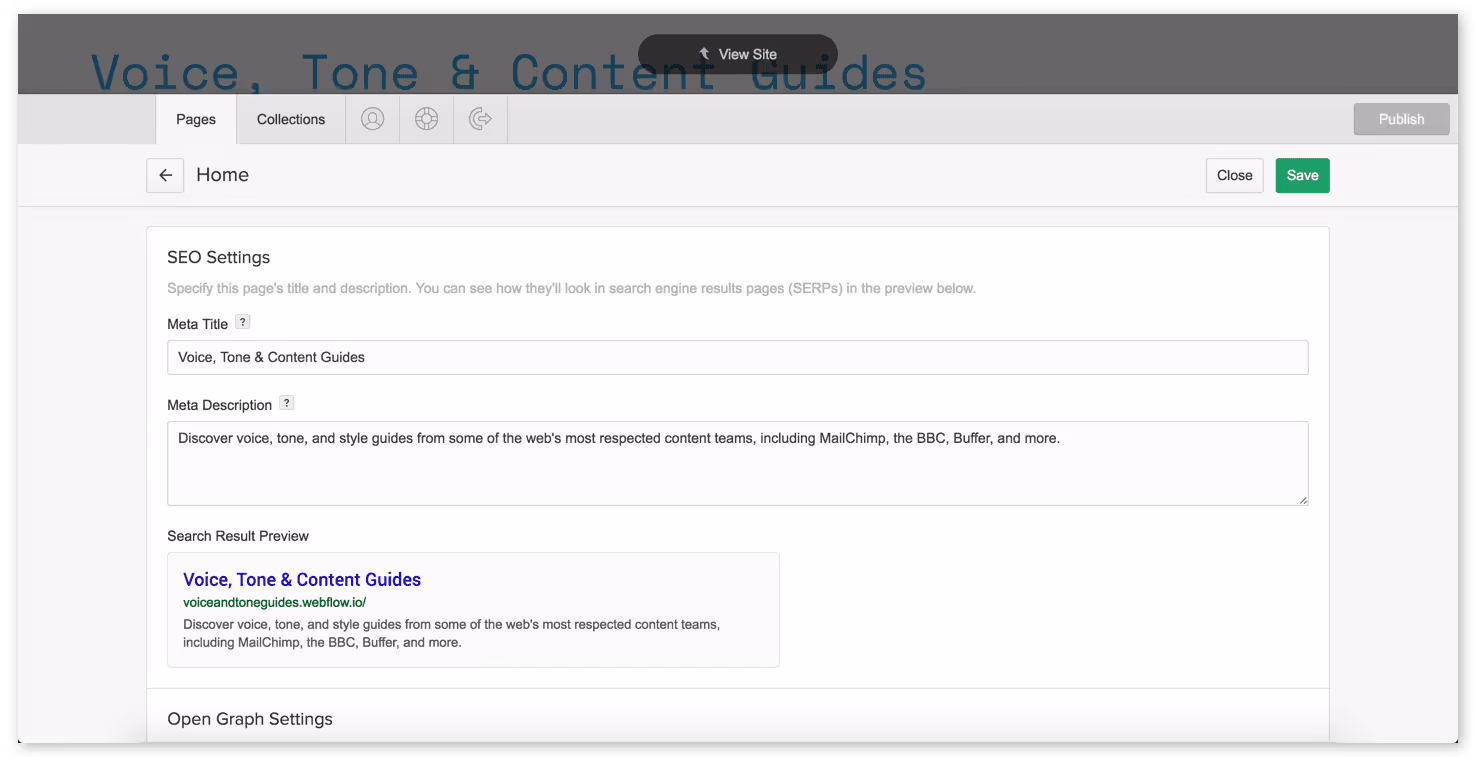
In each page’s settings, you can create and edit the following page-specific SEO settings:
The Search Result Preview sections show you what the content you’ve entered will look like on a Google search results page. If any of your text gets cut off in the preview, you’ll want to trim your text to fit.
Open Graph settings are very similar to SEO settings, except that they’re used by social networks like Facebook, Twitter and LinkedIn. If you use any of these social networks, you’ve seen Open Graph at work many times.
In most cases, you can just tick the checkbox to use the same content as your SEO title and description. But feel free to customise it, if you’d like.
Open Graph also allows you to specify an image to be displayed along with your title and description.

The Collections tab is very similar to the Pages tab, but it only lists your Collection content — the stuff I created with the CMS.
When you click on a Collection, you’ll be taken to a new tab with a list of all the items in the Collection.

To start creating a new item within this Collection, click the + New button and fill out the item’s various fields, paying close attention to the help text and other requirements for each.

What you see within an individual Collection item will change based on the structure of the Collection it belongs to, but you’ll see several elements over and over again:
The Save and Publish buttons should be fairly self-explanatory. Just note that you’ll need to click Publish twice to confirm your action.
Every time you click Publish in your CMS, your whole website gets republished. If you know that others are working on the site when you're ready to publish, you may want to ask them if they're ready for their changes to go live.
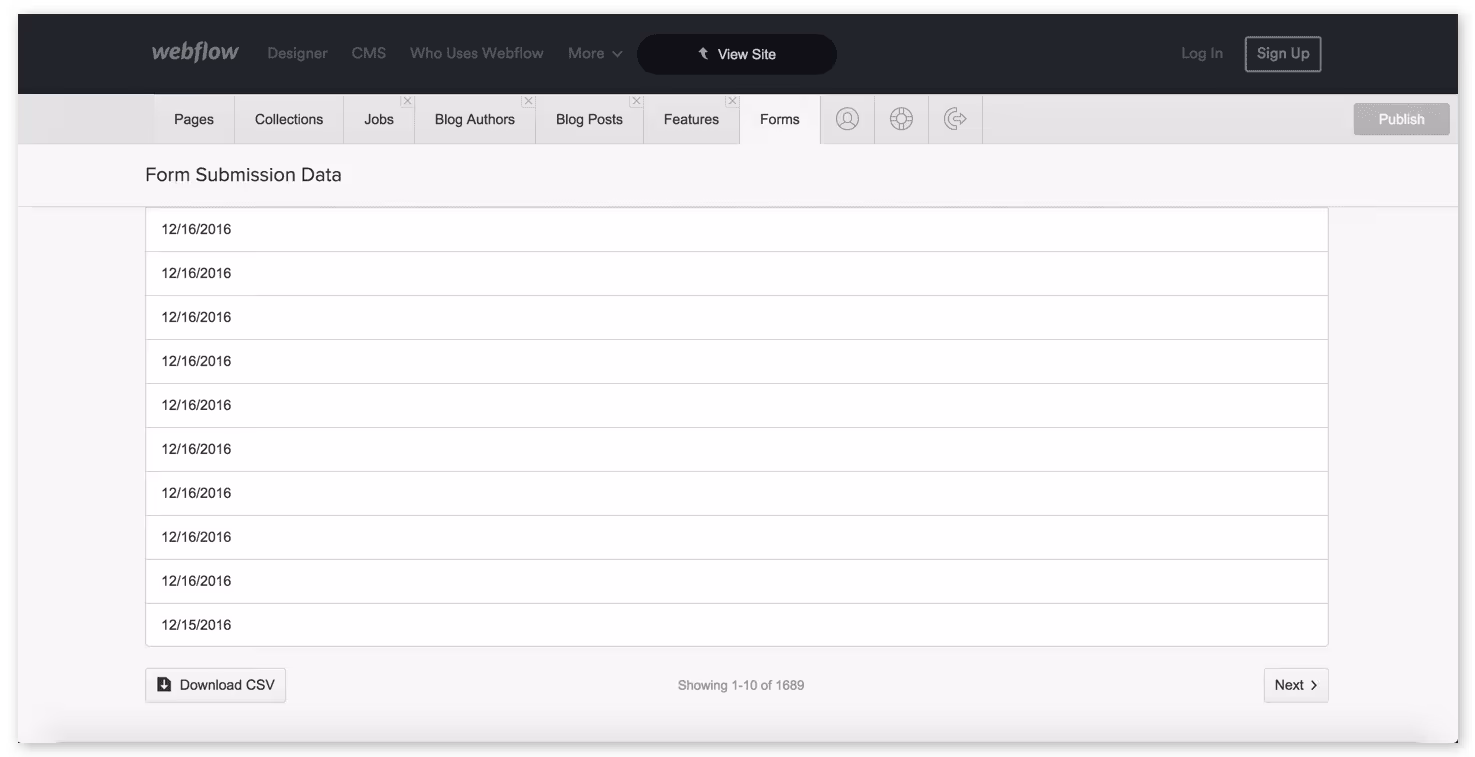
Your CMS may include a Forms tab. If it does, you’ll be able to view some basic information from forms people have submitted, but it’s most useful as a place for you to download the complete form data. In the downloaded CSV file (a format that works with all the major spreadsheet apps), you’ll be able to see all the submitted info.
After the Pages and Collections tabs, you’ll see three icons. From the left, these are:
Shows information about your CMS account, including the associated email and your photo, if you’ve uploaded one. If you haven’t, you can upload one here.
Provide answers to a few common questions about using the CMS.
Logs you out of the CMS to view your site as anyone else would.
SEO stands for "search engine optimisation" and, simply put, it's a group of practices designed to ensure that people can find your content when they search for topics you write about on Google, Bing, and other search engines.
Your CMS allow you to customise the "meta title" and "meta description" — two of the most important SEO elements — for every page and Collection on your website.
Your CMS give you two ways to edit content that’s already on your site:
I'll walk you through both (extremely simple) ways to edit, starting with on-page editing.
Editing right on the page is pretty intuitive with your CMS, but there are a few things to know.
When you first log in to your CMS, you’ll see your live website with the CMS panel (the grey bar) collapsed at the bottom of your screen.
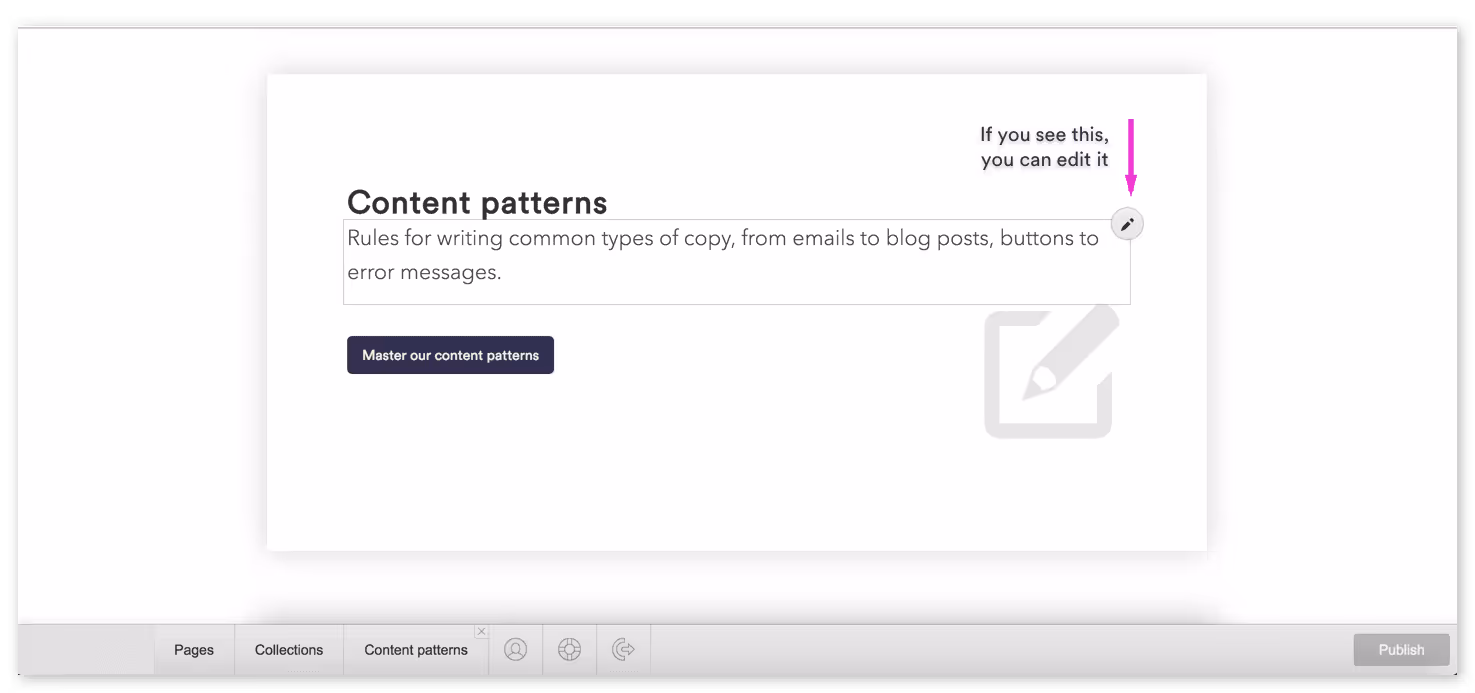
If you see some text you want to edit, just hover your cursor over it. If a light grey outline with a pencil icon in the upper right appears, you can edit that content. Just click into the box and start typing!
Editing text works just like it does in Microsoft Word or Google Docs, but styling your text — bolding, italicizing, etc. — works just a little differently. (Though if you’ve used Medium, it’ll feel pretty familiar.)
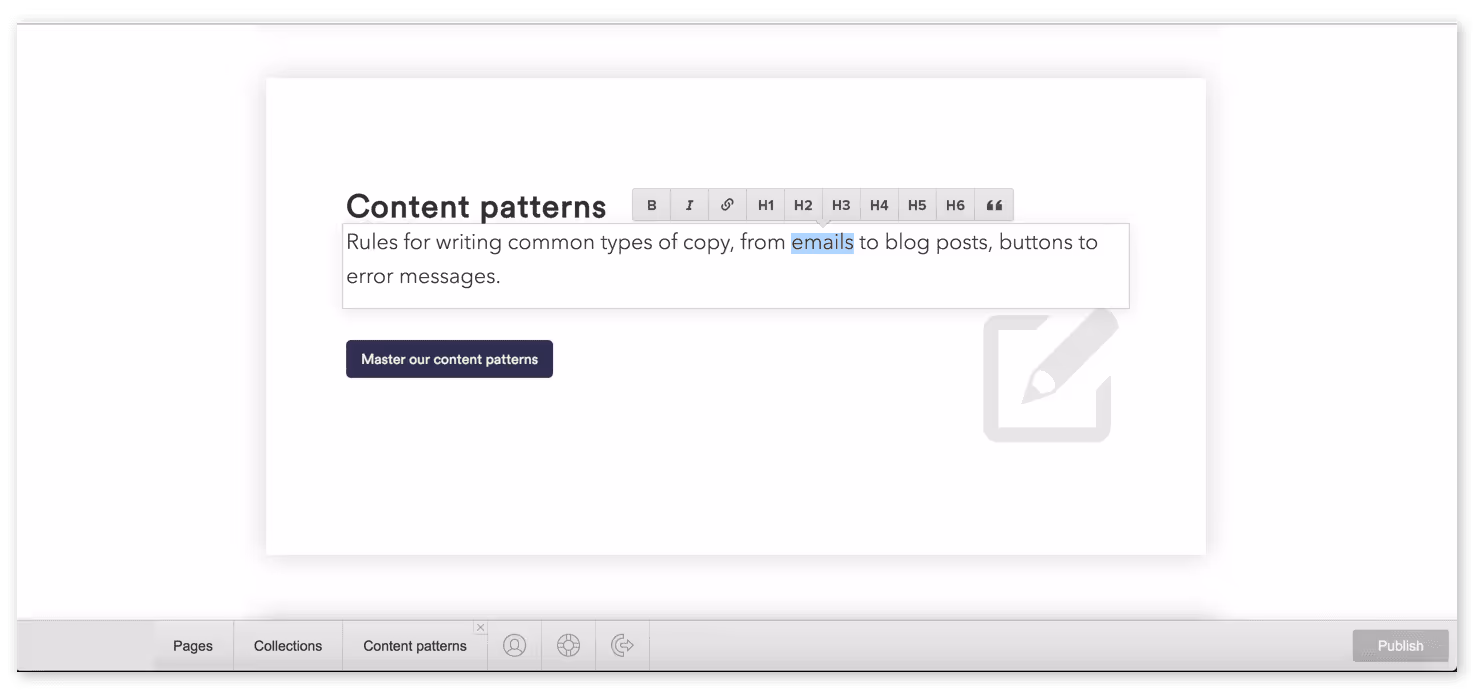
To style text, first select it. A grey toolbar will then pop up, giving you the following options:
You can also style text with the following key combinations:
To use a key combination, just press and hold Command (on Mac) / Control (on Windows), then press the letter key (B, I, or K), then release.
Your CMS allows you to add a variety of link types to achieve various functionalities.

When you go to insert a link, the toolbar defaults to entering a URL to link to, but if you click the link icon on the left, you can select from several other options:
Each link type offers its own customization options. Click the gear icon to see what’s available for your current link type.
Some areas of text on your website (typically longer passages) will allow for additional options.
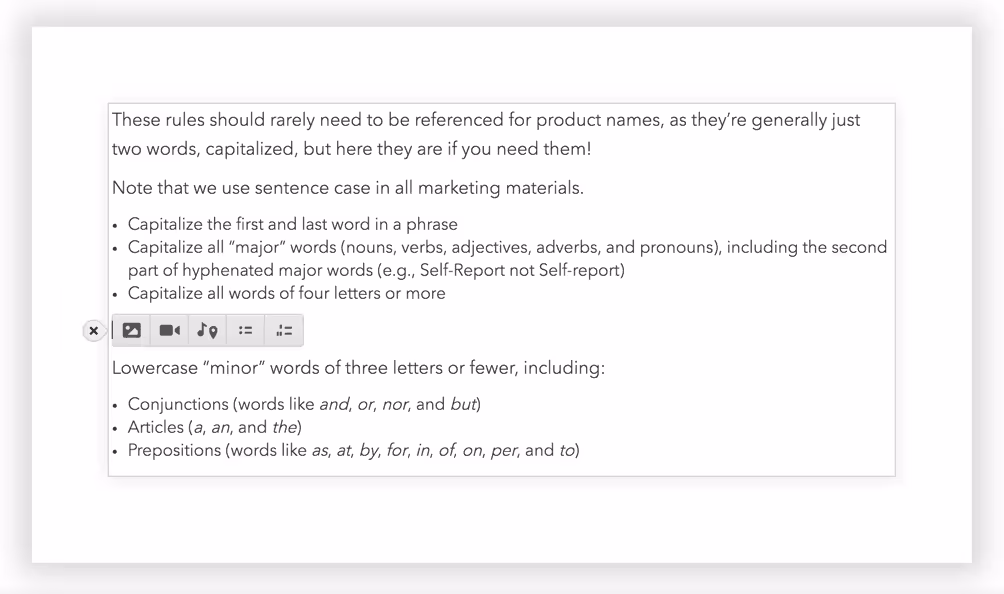
When you press enter/return to start a new paragraph, you may see a small + icon. Click it to open the toolbar and see the following options.

Allows you to upload an image.

Allows you to insert a video. This must be a video hosted on a platform like YouTube or Vimeo — you can’t upload a video file from your computer.

Allows you to embed “rich media,” via a link. There are all sorts of objects you can embed using this feature, but here a few of the most popular:

Allows you to add a bulleted list.

Allows you to add a numbered list.
Everything you’ve just read about editing text on the page also applies when you’re in the Items tab of the CMS.
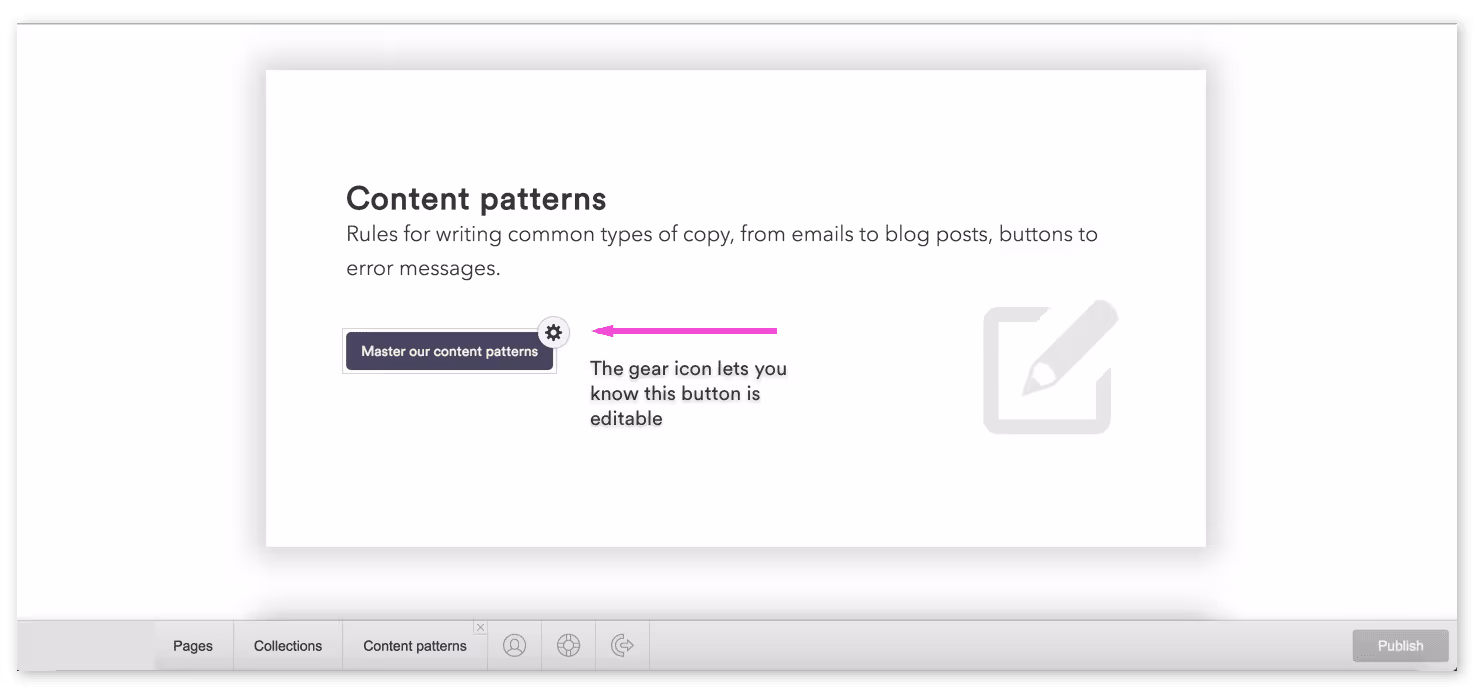
You can also edit buttons in the CMS. Just hover your cursor over the button and look for a gear icon in the upper right. Click the gear icon and you’ll see two options:

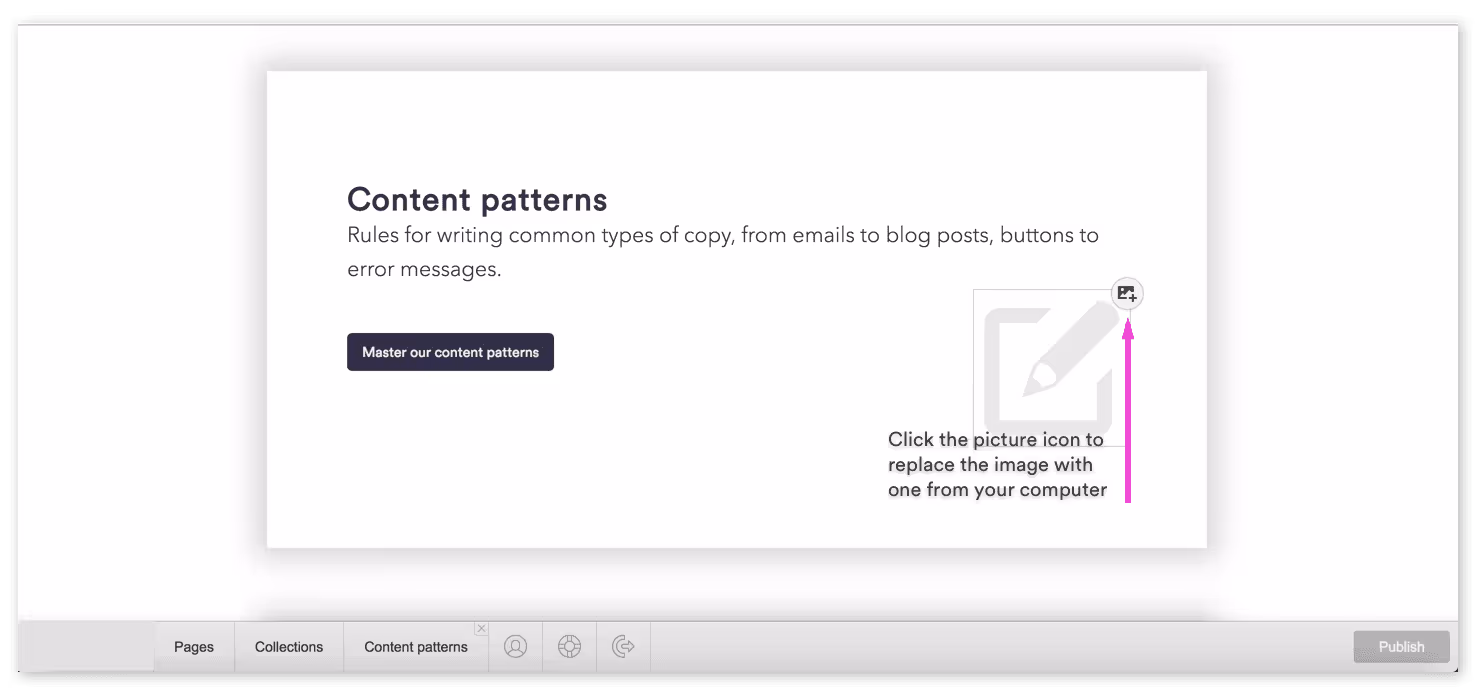
You can also replace images on your site with the CMS. Just hover your cursor over the image you want to update, then click the picture icon.
This will open your computer’s file finder, where you can select any image you’d like.
Note: Sometimes, certain visual styles will automatically apply to the image you upload, so don’t be surprised if your image suddenly changes size, acquires a coloured border or shadow, etc.

Sometimes you'll want to delete, archive, or publish several items all at the same time. In those moments, you can click the Select... button to change the status of multiple items, just like in Gmail. This can be especially handy if you want to publish multiple connected pieces (such as a series of articles) all at once
You can use your CMS to produce new content through any of your Collections, so it’s super easy to create a new blog post, menu item, product or service page — whatever your Collections enable!
This should all be fairly intuitive, and the labels and descriptive text for each field should also help you out immensely. But there are a few things worth calling out:
The Name field is a default for all Collections, and it typically does triple-duty as:
There may, however, be separate fields for items 1 and 2.
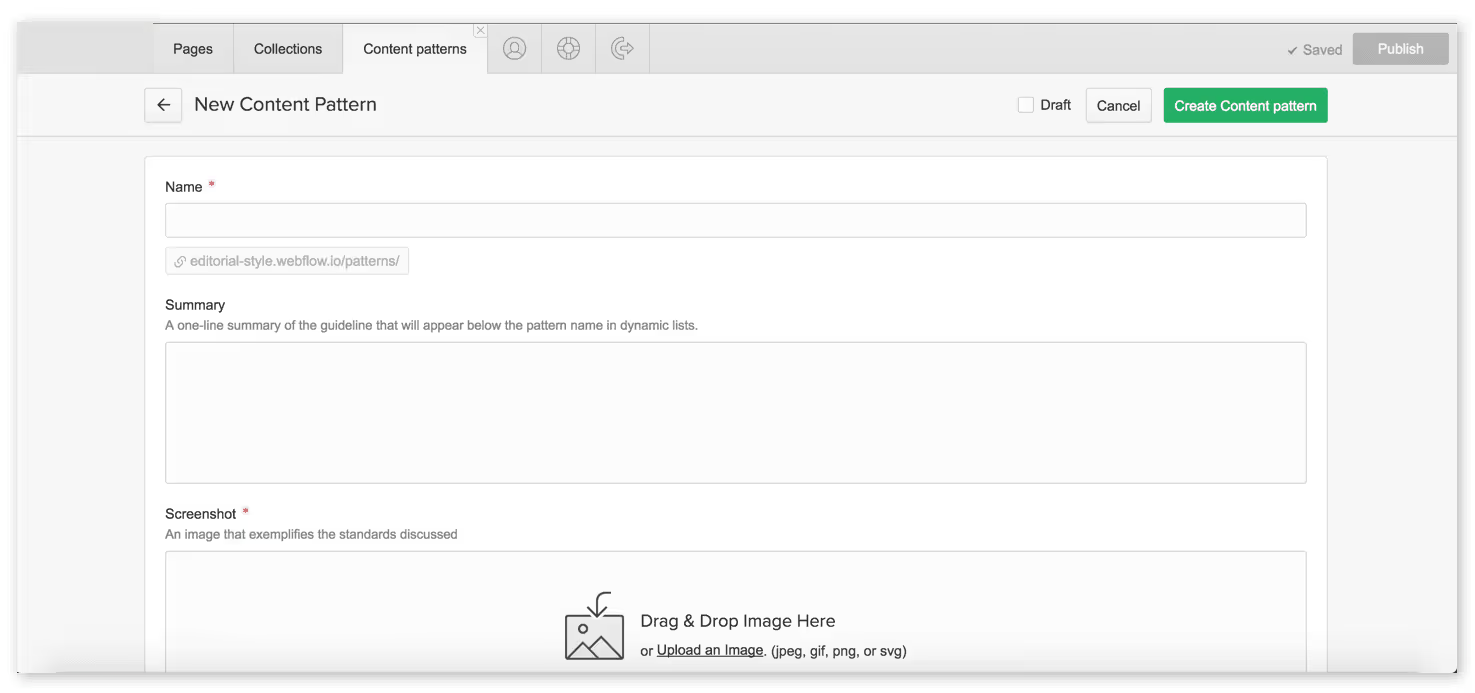
Anywhere you see “Drag & Drop Image Here,” you’re looking at an image field. You can either drag an image from another app on your computer into the CMS, or click the “Upload an Image” link to upload it through your computer’s file management system.
Note that your CMS can’t handle image files over 4MB. If your file is bigger than that, you can use Photoshop or an online tool like TinyPNG or Compressor to get your files under that threshold. Just keep in mind that the larger the image, the longer it takes to load, so try to get your images as small as possible without losing quality.
It’s also up to you to ensure that you have the right to use any images on your website.
If you see any fields with a magnifying glass icon on the right, your Collection has a Reference or Multi-Reference field. This allows you to import content from one Collection into another, which can be used to power things like categories and tags (common blog features).
To use a Reference field, just click into the field and selected the right reference for your new item. If you don’t see the right reference for your new page, you may need to create a new item in the Collection this field references.
This may be explained in the help text for your Collection item, but if it isn’t, contact us at support@combinate.me for help.
The Option field works similarly to References, but isn’t connected to another Collection item. So you can just click into the field and pick the right option for the new content. If you need a new Option to fit your content, contact us at support@combinate.me.
The video field lets you add a video to your new content. It works by pulling your content from a public video host like YouTube or Vimeo, so you can’t just upload a video file. If you have a video file you want on your site, upload it to YouTube or another service, then just copy and paste the URL into the Video field.
Note: you don’t need an embed code generated by services like YouTube, just the URL.
The Switch field is a simple on/off, yes/no toggle that enables or disables functionality on your website. If you’re not sure how this works on your site, contact us at support@combinate.me.
The Colour field allows you to add a splash of colour to your content in a way that your site’s designer defines. The field itself allows you to choose a colour visually, from the picker, or to enter what’s called a “hex code” — a numeric representation of the colour.
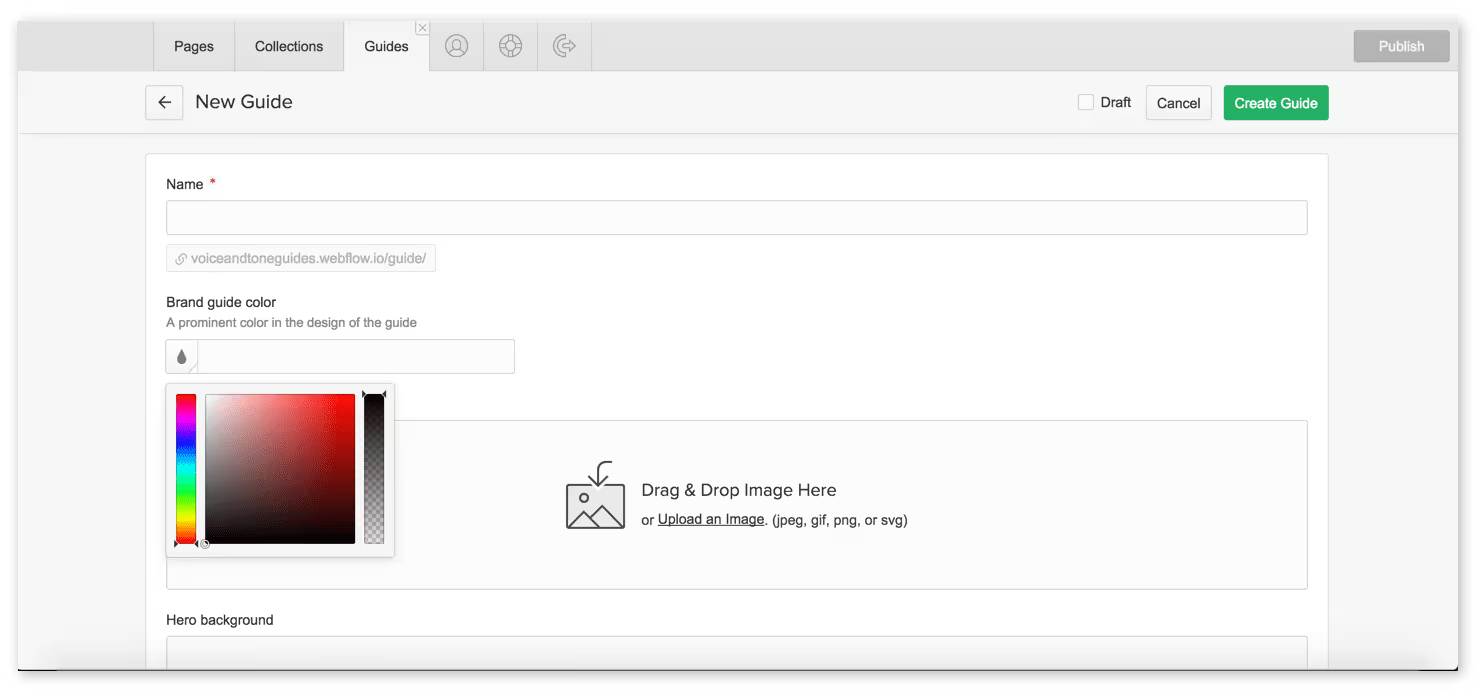
Using the colour picker can take a little getting used to at first, but you’ll get the hang of it quickly. The bar on the left represents the whole spectrum of available colours — clicking here will update the colour swatch in the middle to a range of tones in the area you clicked. The middle area is where you’ll choose the exact colour you want. The bar on the right represents the colour’s opacity, which controls how transparent the colour is.
If you'll be working with colour on your site a lot, you might want to grab the Chrome / Firefox plugin ColorZilla, which essentially lets you copy any colour you see on the web to then paste into the colour picker.
If you’re the only person working with the CMS on your website, you’ll get along just fine writing, editing, and publishing, all within the CMS.
But if you're writing and editing team is larger than one, you’ll probably want to use a different tool for writing, sharing, editing, and collaborating on content.
Why? Well, there are two big reasons:
Here are a few writing tools that offer a great writing experience, easy collaboration with others and work well with your CMS in that you won’t lose formatting when you copy and paste content from them into the CMS.
Writing gets a lot faster when you can keep your fingers on the keys. These key combinations help you do that:
Use Command on Macs and Control on Windows.
For shorter content, you can write and edit right on your live website whenever you'd like.
But for longer content that needs a few extra eyes, it's often better to write, collaborate, and edit in a separate app, and then paste your content into the CMS when you’re ready to publish.
This makes collaboration easier, and Google Docs works particularly well because its heading and formatting options carry over to the CMS.
However, after pasting your Google Docs content into the CMS, be sure to delete and re-upload your images to ensure they've loaded into your website properly.
You can download images from a Google Doc by going to:
File > Download as > Web Page
Double-click the downloaded ZIP file to unpack it, and you should see a folder labelled "Images."
If you edit content that comes from one of your CMS Collections, all other instances of that same text will automatically update across your site.
For example, if you edit the title of a blog post on your blog’s index page, the title will update on the individual blog post’s page, as well as anywhere else it appears on your site.
To continue with the above example, let's say you edited a blog post's title, and now you realise you want to update the URL to match the new title.
Good thinking, and the good news is that you can also edit the URL in the CMS.
However, this will break any links to the old URL!
Don't worry: We can fix this, but it's best to let us know before you edit the URL.
Logging in to your CMS—and getting back to it.
Logging in to your CMS—and getting back to it.
Taking control of your beautiful new website starts with accessing its built-in content management system (CMS for short). And that process usually starts with an email from your website’s designer.
It probably looks a bit like this:
When you click that button, you’ll be taken to your website’s CMS — which, at first, will look just like your new website. Except now, you should see a grey bar across the bottom, with a simple form.
Then, just fill in the required fields to create your account and log in.
Now, your content management system should look just like your website — except there’s a toolbar with two browser-like tabs labelled Pages and Collections, plus a series of icons. I'll explain all that below.
For now, take a moment to bookmark this page so you can easily return to it later. In most browsers, you can bookmark a page by holding Command/Control + B.
Otherwise, you can always return to your site’s content management system by simply typing the URL, then adding /?edit to the end.
So if your website’s URL is yourwebsite.com, just go to yourwebsite.com/?edit to log in and start editing.
When you return to your site later, you may see a little pencil icon in the lower right, which you can click to hop into your CMS. Rest assured that only those with access to the CMS will see this icon!
With the basics out of the way, let's dig into the CMS itself.
In the world of web design, CMS stands for Content Management System. As the name suggests, it's a system for managing the content of your website.
CMS was invented for two reasons:
Your CMS allows you to edit almost any existing content on your website, including text (or “copy”), images, buttons, links, etc.
It also allows you to create some new pages and blog posts through Collections.
An overview of your CMS's features and sections.
Now that you’ve created an account for your site’s CMS and know how to get back in to it anytime, let’s get to know the interface itself.
Let’s start with the two tabs on the left, Pages and Collections. These are your CMS’s two default tabs. You’ll be able to open more tabs, as you’ll see later, but these two will always be there for you.
The Pages tab, as you might imagine, contains a list of your site’s pages. It’ll be divided into at least two sections, but probably more:
The Pages tab allows you to do several things:
Because these page settings are so important for search and social, let’s dig a little deeper into what each of these settings actually means, and how you can make the most of them.
SEO stands for “search engine optimisation.” It’s the practice of building and improving websites in order to improve their chances of being found through search engines like Google, Bing, etc.
In each page’s settings, you can create and edit the following page-specific SEO settings:
The Search Result Preview sections show you what the content you’ve entered will look like on a Google search results page. If any of your text gets cut off in the preview, you’ll want to trim your text to fit.
Open Graph settings are very similar to SEO settings, except that they’re used by social networks like Facebook, Twitter and LinkedIn. If you use any of these social networks, you’ve seen Open Graph at work many times.
In most cases, you can just tick the checkbox to use the same content as your SEO title and description. But feel free to customise it, if you’d like.
Open Graph also allows you to specify an image to be displayed along with your title and description.
The Collections tab is very similar to the Pages tab, but it only lists your Collection content — the stuff I created with the CMS.
When you click on a Collection, you’ll be taken to a new tab with a list of all the items in the Collection.
To start creating a new item within this Collection, click the + New button and fill out the item’s various fields, paying close attention to the help text and other requirements for each.
What you see within an individual Collection item will change based on the structure of the Collection it belongs to, but you’ll see several elements over and over again:
The Save and Publish buttons should be fairly self-explanatory. Just note that you’ll need to click Publish twice to confirm your action.
Every time you click Publish in your CMS, your whole website gets republished. If you know that others are working on the site when you're ready to publish, you may want to ask them if they're ready for their changes to go live.
Your CMS may include a Forms tab. If it does, you’ll be able to view some basic information from forms people have submitted, but it’s most useful as a place for you to download the complete form data. In the downloaded CSV file (a format that works with all the major spreadsheet apps), you’ll be able to see all the submitted info.
After the Pages and Collections tabs, you’ll see three icons. From the left, these are:
Shows information about your CMS account, including the associated email and your photo, if you’ve uploaded one. If you haven’t, you can upload one here.
Provide answers to a few common questions about using the CMS.
Logs you out of the CMS to view your site as anyone else would.
SEO stands for "search engine optimisation" and, simply put, it's a group of practices designed to ensure that people can find your content when they search for topics you write about on Google, Bing, and other search engines.
Your CMS allow you to customise the "meta title" and "meta description" — two of the most important SEO elements — for every page and Collection on your website.
Learn how to change the content and components.
Your CMS give you two ways to edit content that’s already on your site:
I'll walk you through both (extremely simple) ways to edit, starting with on-page editing.
Editing right on the page is pretty intuitive with your CMS, but there are a few things to know.
When you first log in to your CMS, you’ll see your live website with the CMS panel (the grey bar) collapsed at the bottom of your screen.
If you see some text you want to edit, just hover your cursor over it. If a light grey outline with a pencil icon in the upper right appears, you can edit that content. Just click into the box and start typing!
Editing text works just like it does in Microsoft Word or Google Docs, but styling your text — bolding, italicizing, etc. — works just a little differently. (Though if you’ve used Medium, it’ll feel pretty familiar.)
To style text, first select it. A grey toolbar will then pop up, giving you the following options:
You can also style text with the following key combinations:
To use a key combination, just press and hold Command (on Mac) / Control (on Windows), then press the letter key (B, I, or K), then release.
Your CMS allows you to add a variety of link types to achieve various functionalities.
When you go to insert a link, the toolbar defaults to entering a URL to link to, but if you click the link icon on the left, you can select from several other options:
Each link type offers its own customization options. Click the gear icon to see what’s available for your current link type.
Some areas of text on your website (typically longer passages) will allow for additional options.
When you press enter/return to start a new paragraph, you may see a small + icon. Click it to open the toolbar and see the following options.
Allows you to upload an image.
Allows you to insert a video. This must be a video hosted on a platform like YouTube or Vimeo — you can’t upload a video file from your computer.
Allows you to embed “rich media,” via a link. There are all sorts of objects you can embed using this feature, but here a few of the most popular:
Allows you to add a bulleted list.
Allows you to add a numbered list.
Everything you’ve just read about editing text on the page also applies when you’re in the Items tab of the CMS.
You can also edit buttons in the CMS. Just hover your cursor over the button and look for a gear icon in the upper right. Click the gear icon and you’ll see two options:
You can also replace images on your site with the CMS. Just hover your cursor over the image you want to update, then click the picture icon.
This will open your computer’s file finder, where you can select any image you’d like.
Note: Sometimes, certain visual styles will automatically apply to the image you upload, so don’t be surprised if your image suddenly changes size, acquires a coloured border or shadow, etc.
Sometimes you'll want to delete, archive, or publish several items all at the same time. In those moments, you can click the Select... button to change the status of multiple items, just like in Gmail. This can be especially handy if you want to publish multiple connected pieces (such as a series of articles) all at once
You can use your CMS to produce new content through any of your Collections, so it’s super easy to create a new blog post, menu item, product or service page — whatever your Collections enable!
This should all be fairly intuitive, and the labels and descriptive text for each field should also help you out immensely. But there are a few things worth calling out:
The Name field is a default for all Collections, and it typically does triple-duty as:
There may, however, be separate fields for items 1 and 2.
Anywhere you see “Drag & Drop Image Here,” you’re looking at an image field. You can either drag an image from another app on your computer into the CMS, or click the “Upload an Image” link to upload it through your computer’s file management system.
Note that your CMS can’t handle image files over 4MB. If your file is bigger than that, you can use Photoshop or an online tool like TinyPNG or Compressor to get your files under that threshold. Just keep in mind that the larger the image, the longer it takes to load, so try to get your images as small as possible without losing quality.
It’s also up to you to ensure that you have the right to use any images on your website.
If you see any fields with a magnifying glass icon on the right, your Collection has a Reference or Multi-Reference field. This allows you to import content from one Collection into another, which can be used to power things like categories and tags (common blog features).
To use a Reference field, just click into the field and selected the right reference for your new item. If you don’t see the right reference for your new page, you may need to create a new item in the Collection this field references.
This may be explained in the help text for your Collection item, but if it isn’t, contact us at support@combinate.me for help.
The Option field works similarly to References, but isn’t connected to another Collection item. So you can just click into the field and pick the right option for the new content. If you need a new Option to fit your content, contact us at support@combinate.me.
The video field lets you add a video to your new content. It works by pulling your content from a public video host like YouTube or Vimeo, so you can’t just upload a video file. If you have a video file you want on your site, upload it to YouTube or another service, then just copy and paste the URL into the Video field.
Note: you don’t need an embed code generated by services like YouTube, just the URL.
The Switch field is a simple on/off, yes/no toggle that enables or disables functionality on your website. If you’re not sure how this works on your site, contact us at support@combinate.me.
The Colour field allows you to add a splash of colour to your content in a way that your site’s designer defines. The field itself allows you to choose a colour visually, from the picker, or to enter what’s called a “hex code” — a numeric representation of the colour.
Using the colour picker can take a little getting used to at first, but you’ll get the hang of it quickly. The bar on the left represents the whole spectrum of available colours — clicking here will update the colour swatch in the middle to a range of tones in the area you clicked. The middle area is where you’ll choose the exact colour you want. The bar on the right represents the colour’s opacity, which controls how transparent the colour is.
If you'll be working with colour on your site a lot, you might want to grab the Chrome / Firefox plugin ColorZilla, which essentially lets you copy any colour you see on the web to then paste into the colour picker.
If you’re the only person working with the CMS on your website, you’ll get along just fine writing, editing, and publishing, all within the CMS.
But if you're writing and editing team is larger than one, you’ll probably want to use a different tool for writing, sharing, editing, and collaborating on content.
Why? Well, there are two big reasons:
Here are a few writing tools that offer a great writing experience, easy collaboration with others and work well with your CMS in that you won’t lose formatting when you copy and paste content from them into the CMS.
Writing gets a lot faster when you can keep your fingers on the keys. These key combinations help you do that:
Use Command on Macs and Control on Windows.
For shorter content, you can write and edit right on your live website whenever you'd like.
But for longer content that needs a few extra eyes, it's often better to write, collaborate, and edit in a separate app, and then paste your content into the CMS when you’re ready to publish.
This makes collaboration easier, and Google Docs works particularly well because its heading and formatting options carry over to the CMS.
However, after pasting your Google Docs content into the CMS, be sure to delete and re-upload your images to ensure they've loaded into your website properly.
You can download images from a Google Doc by going to:
File > Download as > Web Page
Double-click the downloaded ZIP file to unpack it, and you should see a folder labelled "Images."
If you edit content that comes from one of your CMS Collections, all other instances of that same text will automatically update across your site.
For example, if you edit the title of a blog post on your blog’s index page, the title will update on the individual blog post’s page, as well as anywhere else it appears on your site.
To continue with the above example, let's say you edited a blog post's title, and now you realise you want to update the URL to match the new title.
Good thinking, and the good news is that you can also edit the URL in the CMS.
However, this will break any links to the old URL!
Don't worry: We can fix this, but it's best to let us know before you edit the URL.
